

Hi Everyone
I hope you have been enjoying your weekend.
Lots of people have asked me if I will explain how I sew on my cards .. .. or do a YouTube Video tutorial. Sadly I don't have the technology for a video .. .. but I am happy to attempt to show you here on my blog.
It will have to be done over lots of blog posts because otherwise this one will go on for ever and ever. So for however long it takes, I will hopefully encourage some of you to give it a go.
I will cover not only machine stitching but hand stitching and even faux stitching.
It all begins with getting to know, and feeling comfortable, with your sewing machine. So grab it out of that cupboard, or from the cubbyhole under the stairs and remove all the dust!
It doesn't matter if it is an electric machine, or a hand machine. As long as it does straight stitching you will be fine.
There is no need to even thread your machine - today it is just a case of trying to be in control and feel comfortable with your soon to be "best friend".
These are the two machines that I own:
An electric one that Mr Heart bought me .. .. it is nearly 40 years old.

and the second is an old hand sewing machine I bought from an antique shop a few years ago simply because I loved it

If you are someone who uses a machine on a regular basis for fabric sewing projects then you are one step ahead already and may not be interested in my tutorials anyway.. .. .. and you will already know that you will need to keep a separate needle that you use just for sewing paper or card - you don't want to use the same needle on your fabric creations. (It is a bit like cutting card with your dressmaking scissors .. .. .. eeekkkk!!)
So here we go .. .. ..
You may have several "feet" that will clip onto your machine if it is electric .. .. the one I always use looks like this as I can do straight stitching or zig-zag stitching with it.

On my hand machine there is only one foot as you can only do straight stitching with a hand machine.

So here the work begins.
Take a piece of lined paper and line up the needle on the machine with the line on the paper .. .. .. .. now either turn the handle of your manual machine or press the foot gently on your electric machine .. .. .. using thread or no thread.
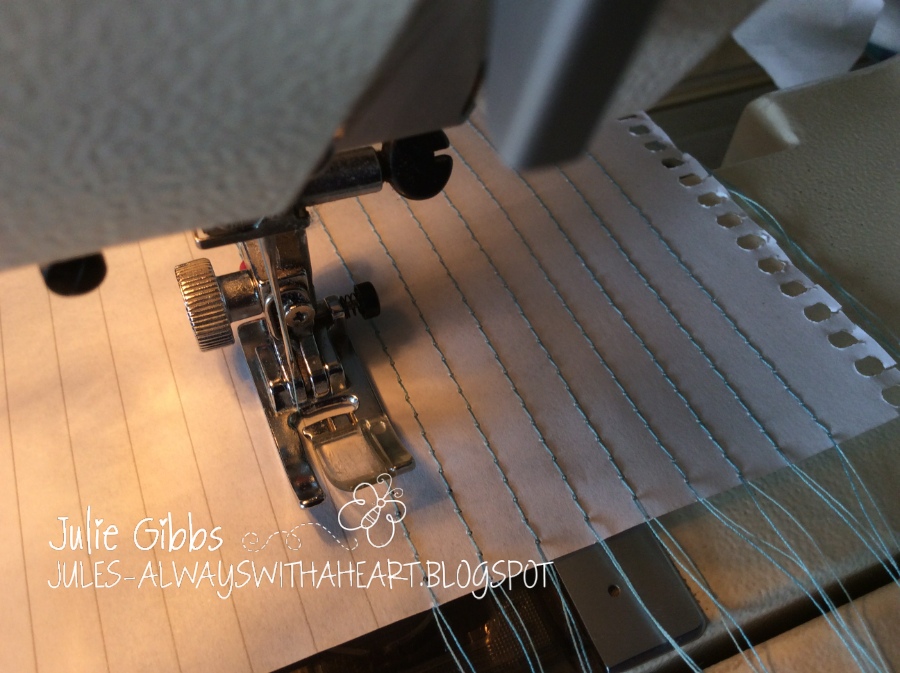

When sewing don't look at any markings that may be on the machine foot or the edge of the foot .. .. .. just concentrate on the needle and the line on your paper.
If the first line you stitch is rubbish .. .. then that is fine .. .. just move down to the next line and continue until the whole of your sheet has been stitched or has holes in it. Hopefully by the time you have reached the last line on your page you will see an improvement from the very first line you did.
Keep repeating on other sheets of paper until you feel happy and in control. Don't throw your sheets away .. .. I will be making a card using the one below at a later stage.

So that is Step One .. .. a nice and easy introduction to get you ready for what is to come.
Keep practising until you feel comfortable and in control and I will see you for Step Two on Tuesday when you have had time to knock all that dust from your machines.
Don't worry if you don't have a sewing machine I will bring alternative options in next time.
In the meantime if you have any questions or points you particularly want me to cover then please let me know and I will try and incorporate those into future steps.

15 comments:
Hi Jules
Great tutorial .... love the hand machine ...I would love one of those ... my Mum used to have a treadle machine ...when we were in bed at night ...we could here her tanking along on the machine ...
I bought a cheap £50 elec...from BHS ... when you put your foot on the pedal ...it went to quick ...and jumpy ... and stitch not in a straight line ...so that was the end of that ...
your cards always look fabulous with the stitching ...
Hugs Sylvie xx
I don't have a sewing machine, but I found this interesting nonetheless, the Singer machine is an absolute beauty
A great tutorial and I'm looking forward to reading future episodes.
Your Singer sewing machine is lovely. When I was a kid my mum had a treadle sewing machine - my sister and I would sit under the table operating the treadle whilst mum stitched our clothes!
Kath x
Thank you for the tutorial Jules...Your cards always look so professional with the stitching and just ours that’s extra touch on them. My mum was a dressmaker so have used machines all my life...I have in my cupboard somewhere a child’s sewing machine might just have to have a rummage...look forward to the next ‘lesson’
Anne
Thanks for this Jules , your stitched cards always look fabulous .x
Thank you for doing this Jules, I will be waiting for the next instalment with interest - your stitching is always fabulous.
Pauline - Crafting with Cotnob
x
Thank you for a great tutorial Jules and for sharing with us.
Sue xx
Had a good giggle at this, I should not as I know that not everyone is comfortable with a machine but I’ve been using one for over 50 years- brilliant invention be it treadle, manual or electric!
Sally xx
Thank you so much for this Jules. I've always loved your stitching on cards - even bought a second small sewing machine just for the purpose - but this step by step guide is fabulous!
Many thanks.
Hugs
Di xx
Great tutorial.
Oh Jules you are a star!!!! Thank You for sharing your tips. Ive got my wee sewing machine out and Ive been trying to stitch paper but what a squint line I have been doing. Off to practice on a piece of paper tonight now!!! I love your vintage machine, its amazing. Think I would have my whole house vintage if I could. Hazelxx
A brilliant tutorial Jules, I love your antique machine, Kate x
Fabulous tutorial Jules will need to practice with the straight lines,I remember learning to sew on a Singer treadle machine
Oh boy, I am loving your tutorial so far Jules!!! I have an electric machine (closes to 30 years old), but what I wouldn't do to have that antique one you have! lol I love the idea of practicing on lined paper, why have I never thought to do that?! It's been a long while since my sewing machine has been brought out, so I could use some practice. My only question is do you use a bobbin too if using thread. You have to right? Or the stitches won't stay??? Yes, I am definitely rusty!!! It's been 10 years or longer since I've had my machine out! Not good. lol Hugs, Brenda
THANK YOU!! xx
Post a Comment