

Hi Everyone
I hope your week has been going well.
Many thanks for all your lovely comments on Step One of my Sewing Tutorial .. .. .. I do hope some of you are taking up the challenge and are getting those poor neglected sewing machines out for a breath of fresh air.
Perhaps I should have thought about doing this as lock-down started. It might have kept people amused during those first long, long days.
For anyone who did get their machine out and "did their lines of sewing" how did it go? Are you willing to share pictures? It would be great if you did. It might encourage others to try or keep trying.
First I will deal with a few queries I had via email and on my blog.
1. Does it matter how long my stitches are?
You are best working with a medium length stitch .. .. mine are about 3mm in length. Though the stitch length isn't really important until we start tackling neat corners. Length will come into play then.
2. Should I be pressing the foot pedal down as far as it will go?
The further down you press the pedal the faster your machine will go .. .. .. and pressing it right down might be far too fast for you to feel in control. It would be different if you were sewing say a long seam on a piece of material, but we are just talking about bits of card or paper and the slower the better really.
3. If using thread do I need a spool on the top and the shuttle underneath.
Yes, you will need both, the two threads interlock into each other to form the stitches.
Hope my answers help.
So here we go with Step Two and I will start by showing you a very basic card that uses just straight lines like you have done on your lined paper .. .. but you don't need to follow any lines now and some people find this easier than the lined paper exercise!
This is the finished card .. .. one of my teeny, tiny 3.5 inch square creations. I find this a great size for trying out new techniques and they make great gift cards, or just a cute little card for sending to someone.

So here is my process:
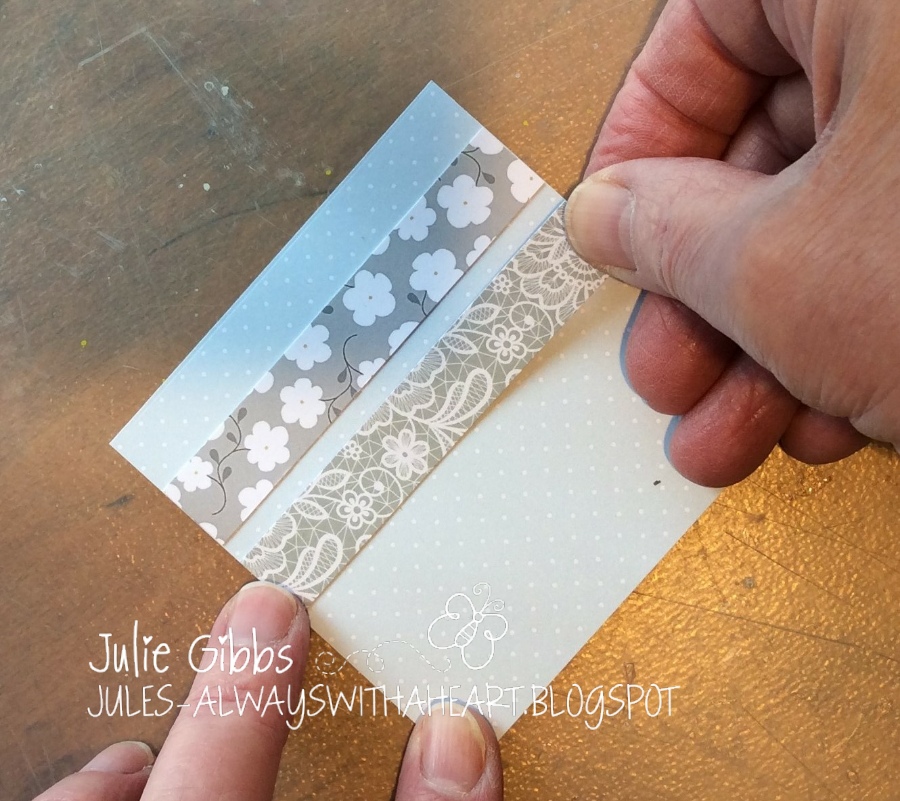
Begin by cutting a square and a couple of strips of design paper.
We aren't going to be tackling any corners (they will make an appearance another time) there will just be four straight lines to attach the two strips to the background.
I attach the strips to the square by adding a thin line of glue across the centre of the strips .. .. don't get glue anywhere near the top and bottom edges because your machine needle is going through that part of the paper and the needle will pick up the glue and take it into the body of your sewing machine. We aren't sewing the short ends of the strips so it doesn't matter that there is glue there.
You could use a thin strip of double sided tape across the centre, but I like to be able to be able to slide things around until I am happy with the positioning.

So both strips are now in place.
Time now to machine them in place.
I always work with the edge of the paper I am sewing on the right, that way I can see exactly where I am sewing.
Use the hand wheel on the side of your machine to insert the needle into the starting position of your work, don't try to just whizz off with a line of sewing.
Once your needle is in place, pull the two strands of cotton to the back of your machine so they don't get tangled into your work. You can now slowly stitch the whole length of the strip, again watching just your needle and this time the edge of the paper you are sewing.
Stitch both strips in the same way.

So you are now left with all of those strands of cotton sticking out from the edge of your work. Don't worry you haven't got to sew them in or tie them off. I pull them to the back and stick them to the centre of my work using sticky tape.


So that is the sewing element done for this card.
I simply mounted the panel onto grey card, and then the base card, using double sided tape. Then added a stamped sentiment and .. .. .. ..
have you recognised what I used for the heart? It was a section from the lines of stitching I did on Sunday.

I glued a die cut heart to the back and left it to go completely dry before trimming around the heart.

The edges of the stitching could fray away and that is fine, but I am a bit OCD and I always end up sticking those down by adding a bit of glue to the cotton using a cocktail stick.
A stitched button to finish and the heart added with foam pads and that is lesson two over.
I will apologise now for the quality of the photographs .. .. I was taking most of them with my i-Pad mini balanced on a tall glass vase (which you can probably see in some of the shots). I set it to a three second delay and got my work worn hands into position in time for it snapping.
It all leaves a lot to be desired I know, but hopefully it works for anyone interested. If I need to explain any of it in more detail then just let me know.
I will now let you continue to stitch your straight lines on whatever you fancy stitching, but come Thursday we will do a bit of hand stitching, and faux stitching for those who don't have a sewing machine.

12 comments:
Clear and detailed information,easy to follow and put into practice!! Thanks for the time you took to do this
Another great tutorial Jules and such a pretty card too.
Kath x
A great detailed explanation of 'how to'. I'm a little concerned that fragments of paper or card (albeit tiny, tiny) will get into the depths of my machine which is one of the reasons, or excuses, for not trying this technique. I did wonder what happened to all the thread ends!!
Great tutorials Jules and an inspired use of your lines of stitching. Look forward to the one on how to do corners as that is what I struggle with x
Morning Jules...thank you for another 'lesson' on stitching cards... I will probably have a play at the weekend...your card is lovely
Anne
A pretty card Jules and some more fabulous tips on stitching - I am waiting for the corners, I always have a problem with my corners!
Pauline - Crafting with Cotnob
x
Thanks for a really useful tutorial, Jules. I do try to incorporate sewing sometimes, but find it tricky. Thanks for the tips, and your final card is very sweet, Jo x
I love this so very pretty, Pop around and teach me :0) hugs Pops x
Thank you for part 2 Jules and thanks for answering my question, which I was pretty sure of the answer. lol I think your photo's are fabulous and perfect for showing us in detail what to do. You are amazing my friend, just amazing! Hugs, Brenda
Super creation.
Kath x
Great card Jules and a brilliant tutorial. Will email you soon!!
Love and hugs,
Carol S.xxxx
Brilliant Tutorial once again, Thank you for sharing. I have just popped a piccy of my starting off on my blog. Tonight I will hopefully get a wee card made using the wee bit of sewing, Hazel :)
Post a Comment